Debug tools with ImGui
Dear ImGui is ideal for information that helps you build the game but is not part of the final game UI: entity inspectors, live values, profilers, spawn buttons, and editor tools.
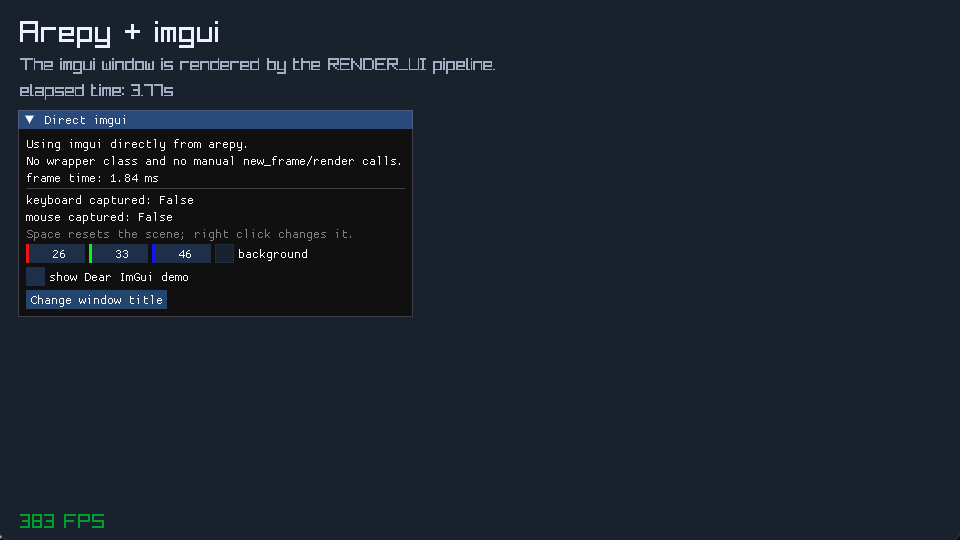
The scene is drawn in RENDER; the debug window is described in RENDER_UI.
Install the optional extra
Inside the Arepy repository, use uv sync --extra imgui.
The immediate-mode mental model
With retained UI toolkits, you create a button object and keep it alive. With ImGui, your code describes the desired window again each frame:
The call draws the button and returns True only on the frame it was clicked.
Your game owns the meaningful state; ImGui owns short-lived interaction state.
A complete panel
Keep panel state in a world resource instead of module globals:
from dataclasses import dataclass, field

from arepy import Display, Time, imgui


@dataclass(slots=True)
class DebugPanel:
    visible: bool = True
    background: list[float] = field(
        default_factory=lambda: [0.10, 0.13, 0.18]
    )


def debug_ui(panel: DebugPanel, display: Display, time: Time) -> None:
    if not panel.visible:
        return

    expanded, panel.visible = imgui.begin("Arepy debug", panel.visible)
    if expanded:
        imgui.text(f"Frame time: {time.delta_seconds * 1000.0:.2f} ms")
        _, panel.background = imgui.color_edit3(
            "Background",
            panel.background,
        )

        if imgui.button("Rename window"):
            display.set_window_title("Debugging Arepy")
    imgui.end()
Register the resource and system once:
What Arepy manages
Arepy's ImGui integration already:
- forwards keyboard and mouse state to the backend;
- starts a new ImGui frame;
- runs
RENDER_UIsystems; - builds and submits the draw data.
Do not call imgui.new_frame() or imgui.render() yourself. Import the module
directly with from arepy import imgui; a wrapper is not required.
Prevent UI input from controlling the game
When the user is typing or dragging a panel, let ImGui consume that device:
def player_input(input_device: Input) -> None:
    io = imgui.get_io()

    if not io.want_capture_keyboard:
        read_movement_keys(input_device)

    if not io.want_capture_mouse:
        read_aiming_mouse(input_device)
This check belongs in shared keyboard/mouse handling. A game that never places ImGui over interactive gameplay does not need it.
Useful first widgets
| Widget | Use |
|---|---|
imgui.text() |
Metrics and labels. |
imgui.button() |
Trigger a one-shot action. |
imgui.checkbox() |
Toggle a boolean. |
imgui.slider_float() |
Tune speed, volume, or timing live. |
imgui.color_edit3() |
Tune RGB colors. |
imgui.show_demo_window() |
Explore the widgets included with Dear ImGui. |
Every successful imgui.begin() must be paired with imgui.end(), even when
the window is collapsed.
Where ImGui belongs
Use ImGui for development tools and inspectors. For a shipped title screen,
HUD, or diegetic interface, draw your own game UI through Renderer2D so it
matches the game's art and works on every target.
Development-time support
ImGui is available in the desktop development environment when the optional extra is installed. The current web target disables it, and the current Windows one-file builder excludes the ImGui stack. Use it as a development tool unless your own packaging pipeline explicitly includes its backend.
Run examples/imgui_minimal.py
for the scene shown above.