2D graphics and assets
Rendering in Arepy has two separate jobs:
- Load or create resources such as textures and fonts during setup.
- Submit draw commands inside a
RENDERsystem.
Keeping those jobs separate prevents disk access and resource creation from leaking into the frame loop.
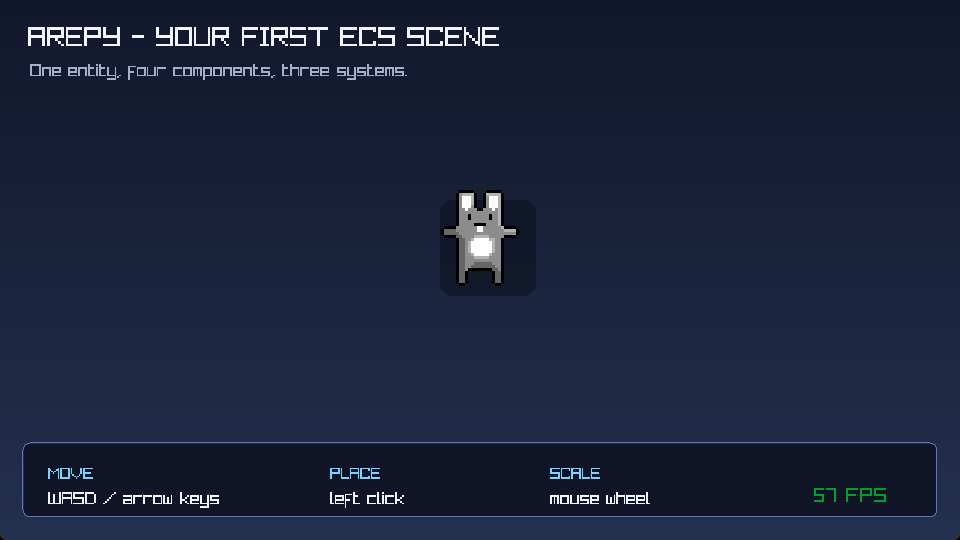
One frame can combine textures, primitive shapes, text, and debug information.
The shape of a render system
Every normal 2D frame follows the same pattern:
from arepy import Color, Rect, Renderer2D

BACKGROUND = Color(15, 20, 32, 255)
ACCENT = Color(116, 92, 255, 255)
WHITE = Color(255, 255, 255, 255)
PANEL = Rect(24.0, 24.0, 260, 72)


def render_scene(renderer: Renderer2D) -> None:
    renderer.start_frame()
    renderer.clear(BACKGROUND)

    renderer.draw_rectangle(PANEL, ACCENT)
    renderer.draw_text("Hello, Arepy", (44.0, 48.0), 24, WHITE)

    renderer.end_frame()
The engine presents the finished frame after all RENDER and RENDER_UI
systems have run. Do not call swap_buffers() from gameplay code.
Load a texture once
AssetStore gives textures stable names, so systems do not need to know where
a file lives. Load and unload a world-owned texture in that world's lifecycle:
from pathlib import Path

from arepy import ArepyEngine


game = ArepyEngine(title="Texture example")
world = game.create_world("level")
assets = game.get_asset_store()
renderer = game.renderer_2d

bunny_path = Path(__file__).parent / "assets" / "bunny.png"


@world.on_startup
def load_level_assets() -> None:
    assets.load_texture(renderer, "bunny", str(bunny_path))


@world.on_shutdown
def unload_level_assets() -> None:
    assets.unload_texture(renderer, "bunny")
The startup hook runs before the world's first frame. Inside its render system, retrieve the already-loaded handle and keep frame boundaries balanced:
from arepy import Color, Rect, Renderer2D, SystemPipeline
from arepy.asset_store import AssetStore


BUNNY_BACKGROUND = Color(15, 20, 32, 255)
BUNNY_TINT = Color(255, 255, 255, 255)
BUNNY_SOURCE = Rect(0.0, 0.0, 32, 32)
BUNNY_DEST = Rect(120.0, 90.0, 64, 64)
BUNNY_ORIGIN = (32.0, 32.0)


def render_bunny(renderer: Renderer2D, assets: AssetStore) -> None:
    texture = assets.get_texture("bunny")
    renderer.start_frame()
    renderer.clear(BUNNY_BACKGROUND)
    renderer.draw_texture_ex(
        texture,
        BUNNY_SOURCE,
        BUNNY_DEST,
        BUNNY_ORIGIN,
        0.0,
        BUNNY_TINT,
    )
    renderer.end_frame()


world.add_system(SystemPipeline.RENDER, render_bunny)
game.set_current_world("level")
game.run()
For a fixed HUD or a single sprite, pre-create reusable Rect and Color
objects at module or resource scope. For many sprites, use a texture atlas and
the batch renderer instead of constructing draw data one entity at a time.
AssetStore is shared by the engine; it does not infer which world owns a
texture. If several worlds share one texture, give it an application-level
owner and unload it only after the last user is finished. Custom fonts follow a
different path: load them with Renderer2D.load_font_ex() and release the
returned ArepyFont with Renderer2D.unload_font().
Source, destination, origin, and tint
draw_texture_ex() uses four pieces of drawing data:
| Value | Meaning |
|---|---|
source |
Rectangle to read from the texture. Negative width can flip it. |
dest |
Position and size on screen. |
origin |
Rotation pivot inside the destination rectangle. |
color |
RGBA tint; white leaves the original colors unchanged. |
The bundled Sprite component stores the asset name and source rectangle.
Transform stores position, origin, scale, and rotation.
Cameras
Store a Camera2D on a camera entity. Wrap world-space drawing between
begin_camera_mode() and end_camera_mode(), then draw the screen-space HUD.
from arepy import Camera2D, Color, Renderer2D
from arepy.ecs import Entity, Query, With


CAMERA_BACKGROUND = Color(15, 20, 32, 255)
CAMERA_TEXT = Color(255, 255, 255, 255)


def render_world(
    camera_query: Query[Entity, With[Camera2D]],
    renderer: Renderer2D,
) -> None:
    renderer.start_frame()
    renderer.clear(CAMERA_BACKGROUND)

    camera_components = next(camera_query.iter_components(Camera2D), None)
    if camera_components is not None:
        renderer.begin_camera_mode(camera_components[0])
        # Draw world-space sprites here.
        renderer.end_camera_mode()

    renderer.draw_text("Score: 120", (20.0, 20.0), 20, CAMERA_TEXT)
    renderer.end_frame()
With no matching camera, the world drawing is skipped but the cleared frame and
HUD remain visible. There is no early return that can bypass the frame's
end_frame() call.
Texture atlases and sprite batches
An atlas combines loaded textures so thousands of sprites can be submitted in large groups. For a batched world, replace the earlier texture startup hook with one that builds the atlas after every texture has loaded:
@world.on_startup
def load_level_assets() -> None:
    assets.load_texture(renderer, "bunny", str(bunny_path))
    # Load any other atlas textures before this call.
    assets.build_texture_atlas(renderer)
Build or rebuild the atlas when the set of textures changes, not every frame.
The bundled render system and BunnyMark use BatchQuery plus
draw_texture_batch() to keep aligned NumPy buffers and avoid one Python draw
setup per sprite.
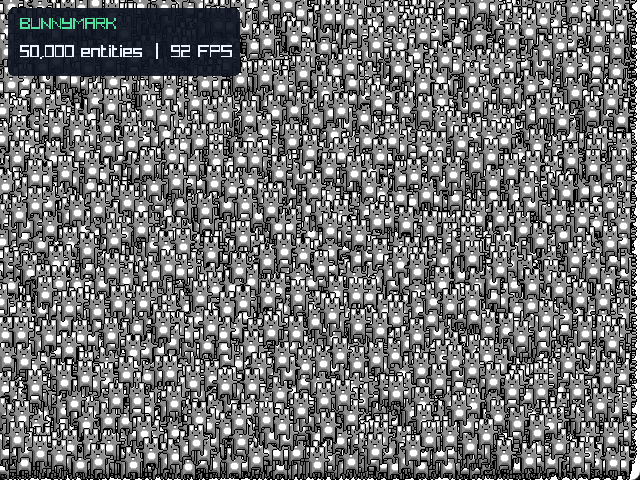
BunnyMark is a stress example, not the recommended first project.
3D graphics
Renderer3D provides cameras, models, meshes, materials, billboards, and 3D
primitives. A render system starts and ends the frame through
Renderer2D, while Renderer3D owns the 3D camera mode and draw calls:
from arepy import Color, Renderer2D, Renderer3D
from arepy.bundle.components import Camera3D, Transform3D
from arepy.ecs import Entity, Query, With

CUBE_COLOR = Color(112, 170, 255, 255)
SCENE_BACKGROUND = Color(15, 20, 32, 255)
SCENE_TEXT = Color(255, 255, 255, 255)


def render_3d(
    cubes: Query[Entity, With[Transform3D]],
    cameras: Query[Entity, With[Camera3D]],
    renderer_2d: Renderer2D,
    renderer_3d: Renderer3D,
) -> None:
    renderer_2d.start_frame()
    renderer_2d.clear(SCENE_BACKGROUND)

    camera_components = next(cameras.iter_components(Camera3D), None)
    if camera_components is not None:
        renderer_3d.begin_mode_3d(camera_components[0])

        for (transform,) in cubes.iter_components(Transform3D):
            renderer_3d.draw_cube(
                transform.position,
                transform.scale.x,
                transform.scale.y,
                transform.scale.z,
                CUBE_COLOR,
            )

        renderer_3d.end_mode_3d()

    renderer_2d.draw_text("3D scene", (20.0, 20.0), 20, SCENE_TEXT)
    renderer_2d.end_frame()
Create the camera, transforms, colors, and meshes during setup. In the cube
loop above, the renderer receives the existing transform.position; it does
not construct a replacement Vec3 for each draw.
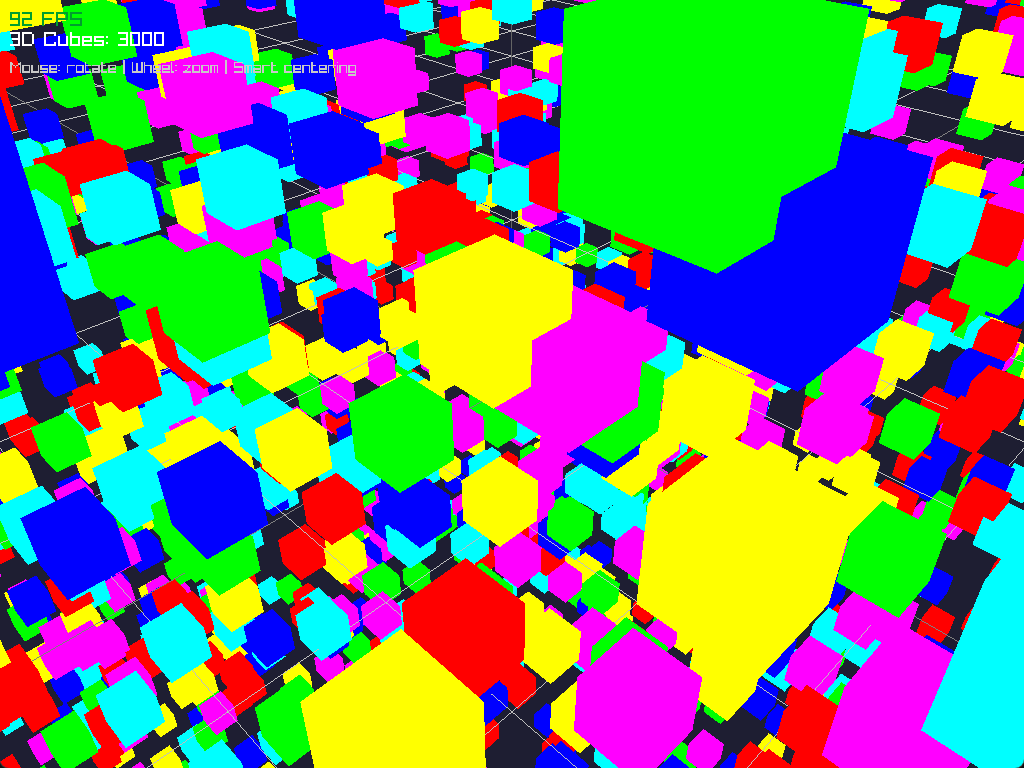
CubeMark keeps its camera and component vectors alive while the scene runs.
See examples/cubemark_3d.py
for a complete example.
Stencil masks
A stencil mask limits later drawing to the shape written into the stencil
buffer. Initialize support once after the graphics context exists, draw the
mask between begin_stencil_mask() and end_stencil_mask(), draw the content,
then call end_stencil_mode().
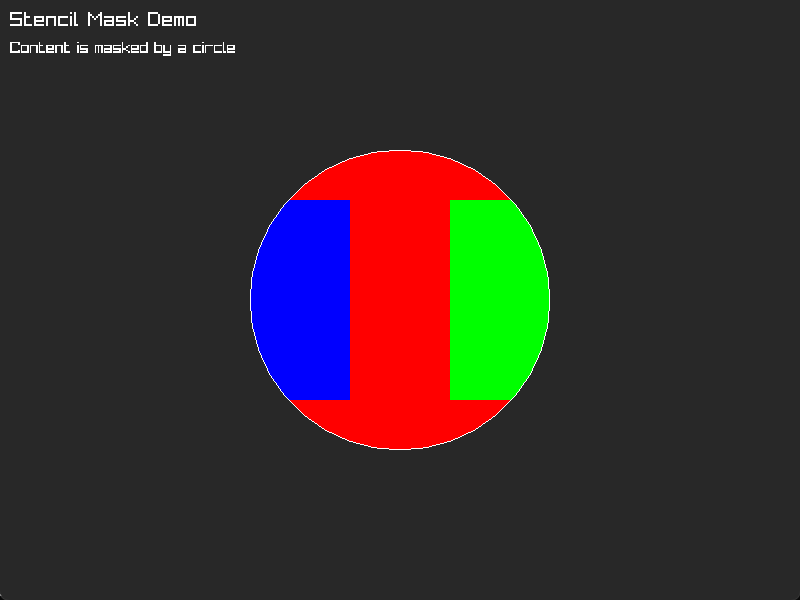
The outline is normal drawing; only the colored rectangles pass through the circular mask.
See examples/stencil_demo.py
for the complete lifecycle and fallback when stencil support is unavailable.
Performance checklist
- Load textures once through
AssetStore; load custom fonts once throughRenderer2D. - Pair each load with the matching unload call in the owner's shutdown path.
- Reuse
Color,Rect, camera, and asset handles where practical. - Mutate existing vectors instead of replacing them each frame.
- Build an atlas outside the frame loop.
- Use
BatchQueryanddraw_texture_batch()for large homogeneous groups. - Measure the result before keeping an optimization.
Continue with Input or the full performance guide.